- Get link
- X
- Other Apps
Hello there. Welcome to the Amigurumi World.
We have a new amigurumi pattern for you today. We bring you new patterns every day.
Amigurumi toy animal knitting models, plush models, baby models, cartoon characters models , fruit models, decorative models, animal models, pencil head models, finger puppet models and more are both the most loved and the most knitted knitting models. You can choose from hundreds of free knitting models and start knitting right away with easy and detailed explanation knitting recipes! Knit a lot, keep it to yourself or give it to your loved ones!

MATERIALS AND TOOLS:
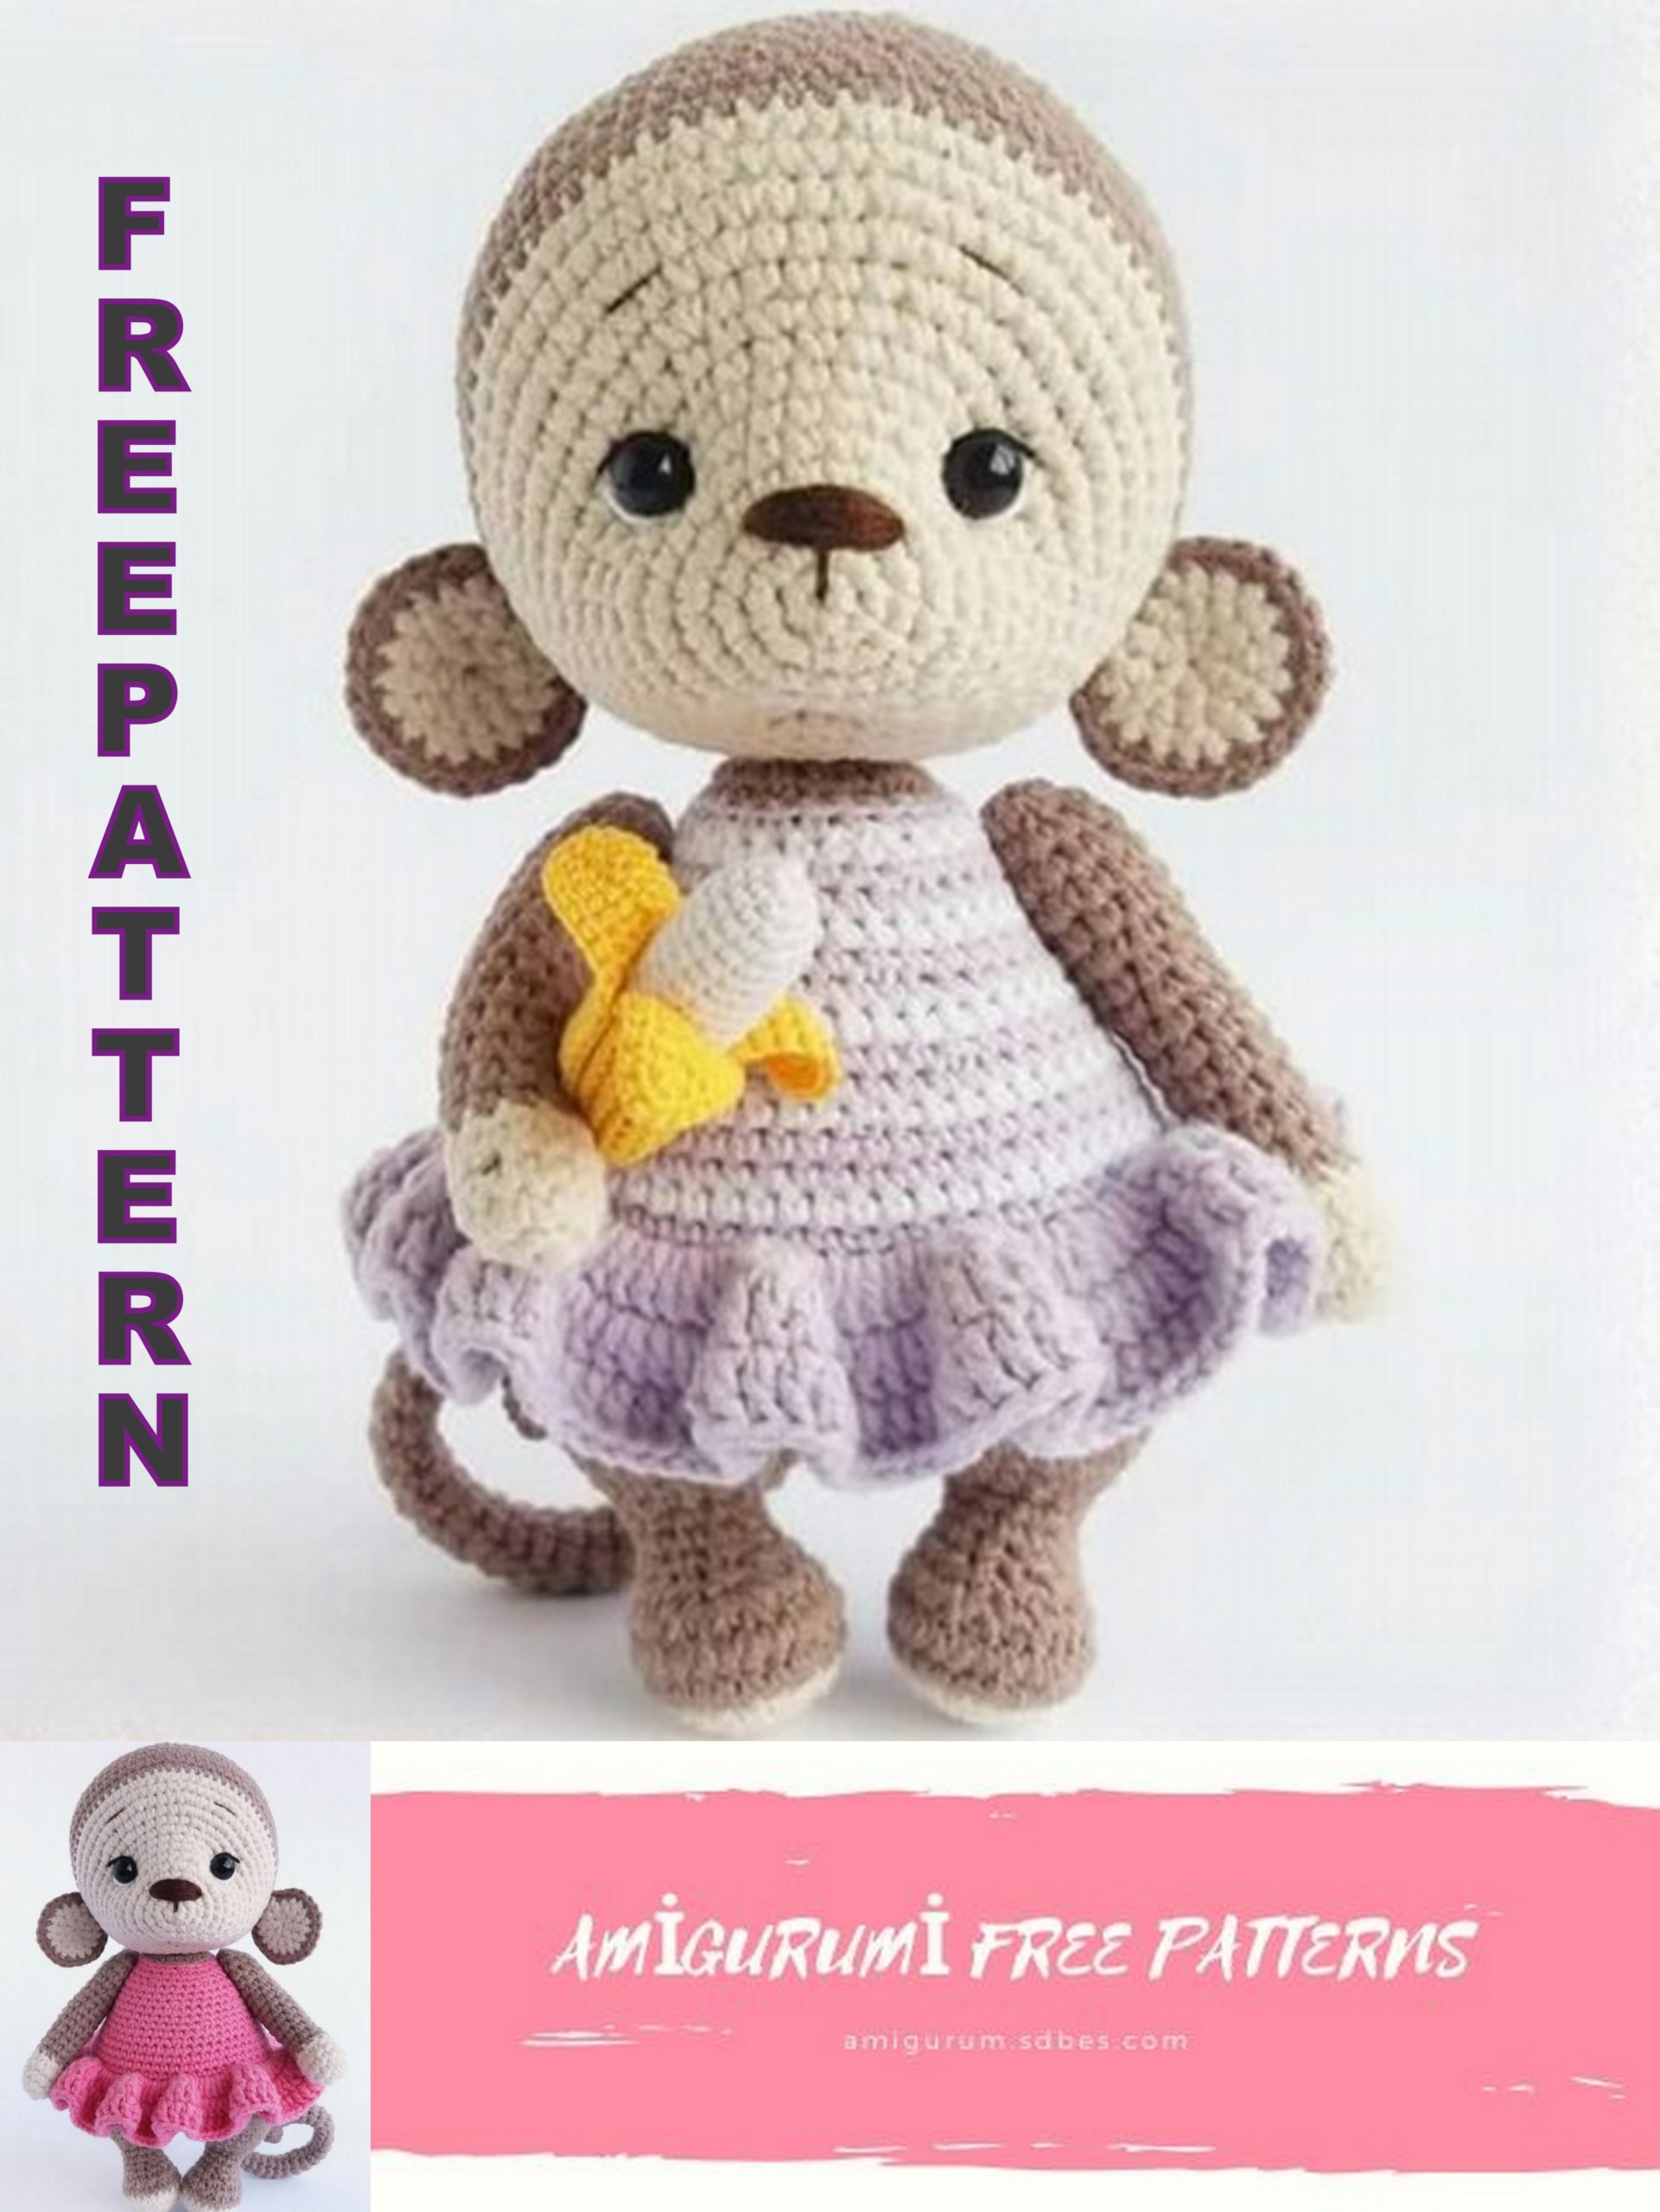
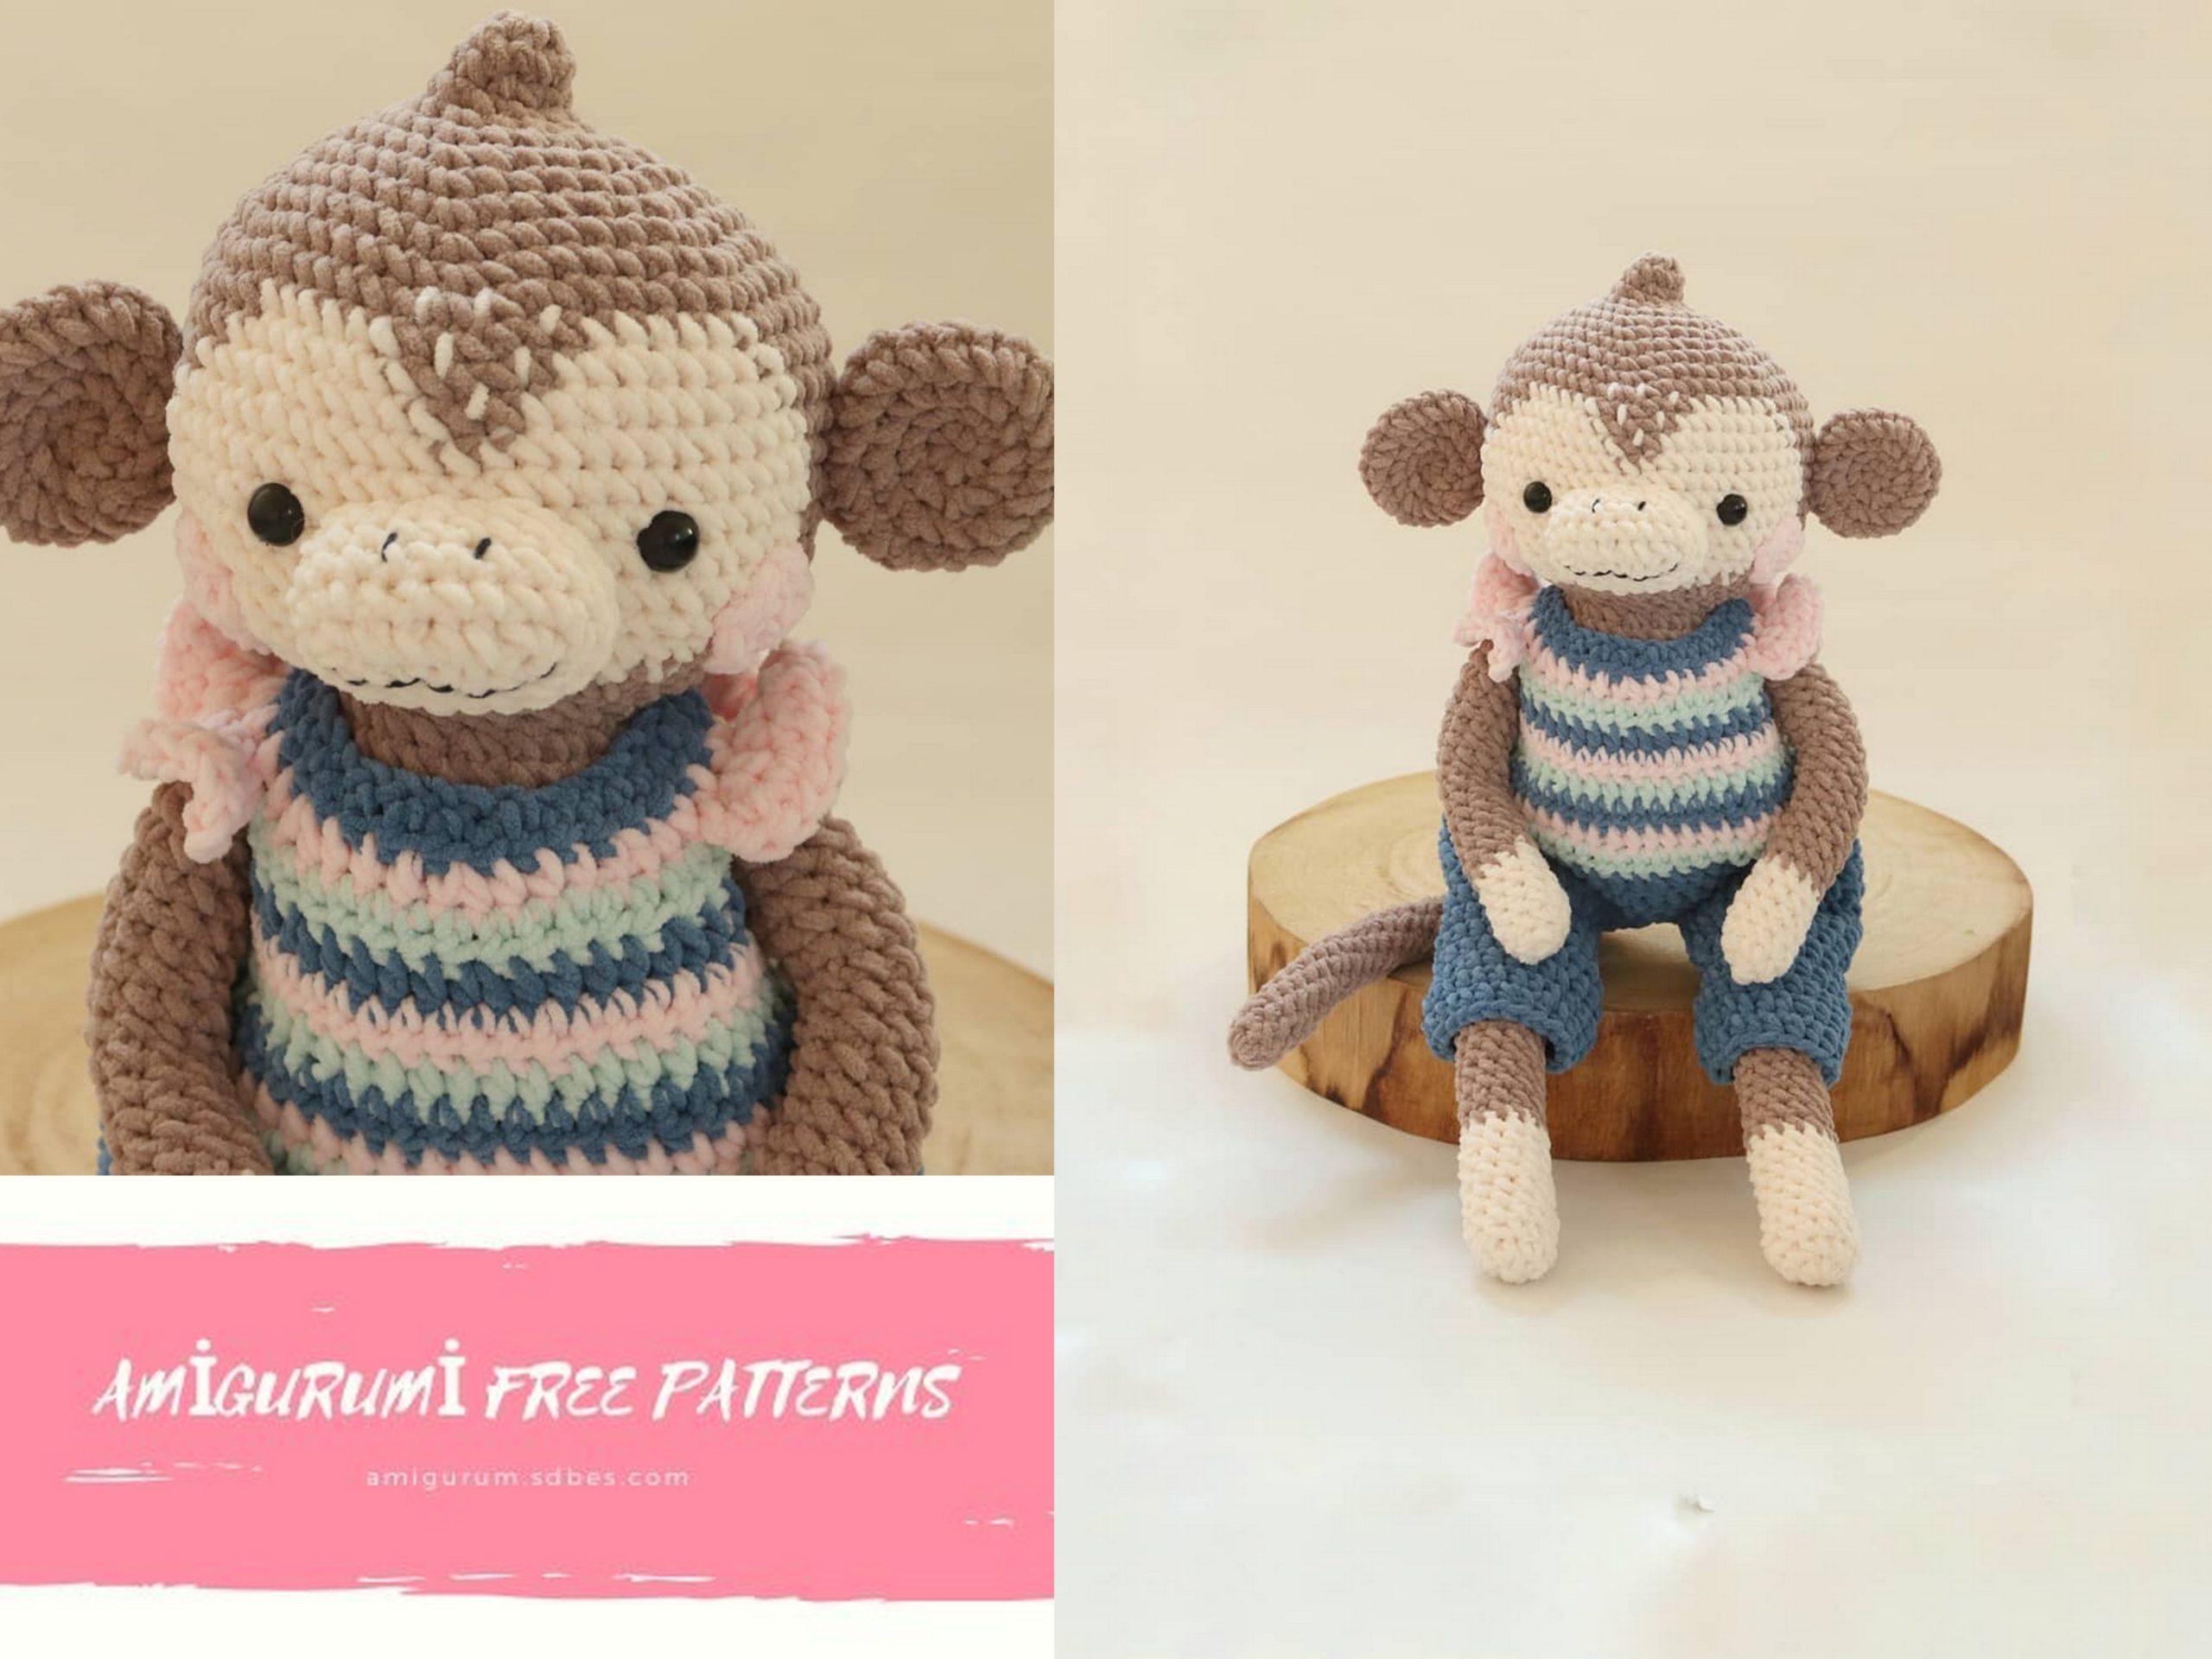
– yarn Jeans YarnArt (160 m/50 g) of brown color (I use №71 (cacao), light beige
color (№05) and additional color for the dress;
– a hook, suitable for the chosen yarn (I use 1.9 mm);
– stuffing (synthetic fluff or hollofayber);
– wooden sticks to help to stuff the toy;
– a sewing needle;
– moulinet threads: white – to embroider the whites of the eyes, black – for the
brows,
– eyes 8 mm in diameter (halfbeads or safety eyes);
– a wire for a frame of the tail (I use a chenille wire)
– if you want to make a cotter pin fastening of the arms and legs, then you’ll need
the following: disks 15 mm in diameter – 4 pcs for the arms, disks 20 mm in diameter –
2 pcs for the head. T-shaped cotter pins: 20 mm – 2 pcs for the arms, 28 mm – 1 piece
for the head.
The size of the monkey is 18 cm, if using the pointed materials.
ADVICES:
1. Each detail begins from the magic ring. Crochet in a spiral.
2. Try to crochet rather tight. If the stitches are not rather tight, try to use a
smaller hook.
3. Stuff your toy in the course of crocheting. The tight stuffing gives a necessary
shape to your toy and helps to keep it.
4. If you make a toy for a child younger than 3 years, then it is better to use the
safety eyes.
5. You can use both cotter pin and thread fastening for the arms. You can just sew
the head.
ABBREVIATIONS:
MR = magic ring;
sc = single crochet;
ch = chain
dec = decrease;
inc = increase;
dc – double crochet
inc dc – crochet two dc in one stitch.
sl st – slip stitch
Arms (2 details)
A marker goes along the center of the back. Begin with a light beige color.
1 rnd: 6 sc in MR
2 rnd: 6 inc (12)
3-4 rnd (2 rows): 12 sc
5 rnd: 4 sc, 2 dec, 4 sc (10)
Change the color to brown.
6-14 rnd (9 rows): 10 sc
15 rnd: inc, 4 sc, inc, 4 sc (12)
16 rnd: 12 sc
17 rnd: (3 sc, inc) х 3 times (15)
18-19 (2 rows): 15 sc. Put the marker for the cotter pins (for the right arms 4
stitches from a marker, for the left arm – 12 stitches from a marker).
20 rnd: (3 sc, dec) х 3 times (12)
21 rnd: 6 dec
Tighten the opening, hide a thread inside the arm.

Legs (2 details)
A marker goes along the center of the back. Crochet with a light beige color.
1 rnd: 6 sc in MR
2 rnd: 6 inc (12)
3 rnd: (1 sc, inc) х 6 times (18)
Change the color to brown.
4 rnd: (2 sc, inc) х 6 times (24)
5 rnd: 24 sc
6 rnd: dec, 6 sc, 4 dec, 6 sc, dec (18)
7 rnd: 5 sc, 4 dec, 5 sc (14)
8 rnd: 5 sc, 2 dec, 5 sc (12)
9-10 rnd (2 rows): 12 sc
11 rnd: (2 sc, inc) х 4 times (16)
12 rnd: (3 sc, inc) х 4 times (20)
For the right leg crochet 5 more sc, fasten off and cut the yarn. Crochet the left leg
similarly, but in the end do not crochet 5 more sc, as we did for the right leg. Do not cut

the yarn.


Body.
Continue crocheting from the left leg.
14: 15 sc, 3 ch, crochet 20 sc along the right leg, further 3 sc along the chain, 5 sc
along the left leg.
15: 15 sc, 3 sc along the place, where a chain was, 28 sc (40)
16: (4 sc, inc) х 9 times, 1 sc (55)
17: 55 sc
18: (10 sc, inc) х 5 times (60)
19-22 (4 rows): 60 sc
23: 52 sc – not complete rnd (you can have more or less than 52 sc, it depend on
your yarn and your gauge. We need to move a marker in the center of the back, further
align a marker)
Change the color to the color of the dress.
24: 14 sc, dec, 28 sc, dec, 14 sc (58)
Now you can stuff the legs, because later it will be rather difficult to stuff them
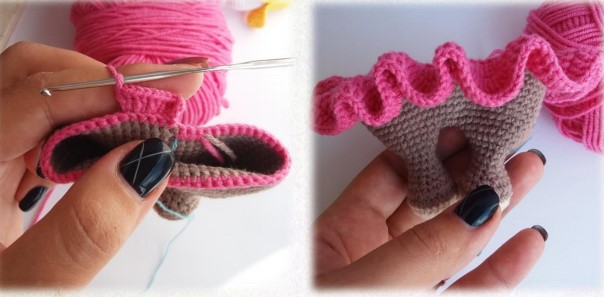
At this stage you can right away crochet the skirt of the dress.
Crochet 3 ch, turn the crocheting and crochet for the remote loop from you.
1 rnd: inc dc in each stitch (58 inc dc) (116)
2 rnd: (1dc, inc dc) х 116
3 rnd: dc in each st around
If you think that the skirt is short, crochet one more row of dc. Fasten off, cut the
yarn and accurately hide the end.
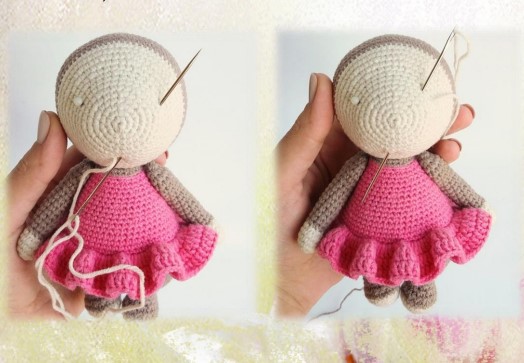
Continue crocheting the body.
25: 58 sc for the back loops only
26: 14 sc, dec, 27 sc, dec, 13 sc (56)
27: 56 sc
28: 13 sc, dec, 26 sc, dec, 13 sc (54)
29: (7 sc, dec) х 6 times (48)
30: 48 sc
31: (6 sc, dec) х 6 times (42)
32-33 (2 rows):42 sc
34: (5 sc, dec) х 6 times (36)
35: 36 sc
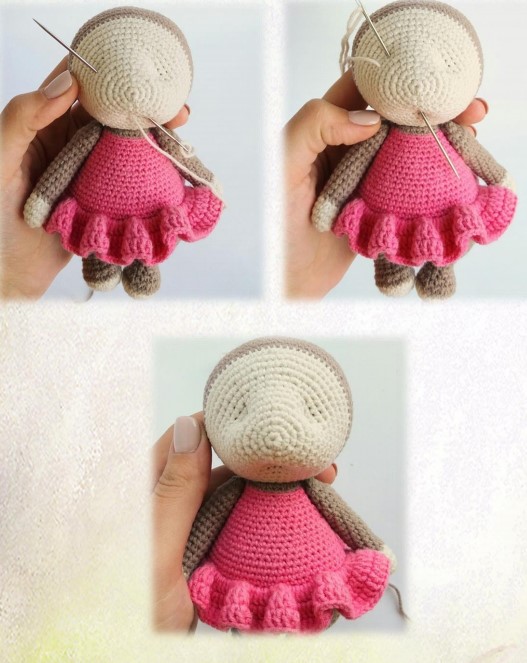
Put the markers for the cotter pins of the arms (the 9th and 28th stitches)
36: 36 sc
37: (4 sc, dec) х 6 times (30)
38: 30 sc
Put the arms and fasten the cotter pins.
39: (3 sc, dec) х 6 times (24)
Change the color to brown.
40: 24 sc for the back loops only
41: (2 sc, dec) х 6 times (18)
42: 18 sc
43: (1 sc, dec) х 6 times(12)
Insert a disk and a cotter pin for attaching the head.
44: 6 dec
Tighten the opening, hide a thread.
Head.
A marker of the beginning of a row goes along the middle of the chin Begin with
light beige color.
1 rnd: 6 sc in MR
2 rnd: 6 inc (12)
3 rnd: (1 sc, inc) х 6 times (18)
4 rnd: 3 sc, 3 inc, 6 sc, 3 inc, 3 sc (24)
5 rnd: (3 sc, inc) х 6 times (30)
6 rnd: (4 sc, inc) х 6 times (36)
7-8 (2 rows): 36 sc
9 rnd: 6 sc, (inc, 3 sc) х 6 times, 6 sc (42)
10 rnd: 6 sc, inc, (5 sc, inc) х 5 times, 5 sc (48)
11 rnd: 14 sc, inc, (3 sc, inc) х 5 times, 13 sc (54)
12 rnd: 17 sc, inc, (3 sc, inc) х 5 times, 16 sc (60)
13 rnd: 60 sc
14 rnd: (9 sc, inc) х 6 times (66)
Change the color to brown.
15-20 (6 rows): 66 sc
21 rnd: (9 sc, dec) х 6 times (60)
22 rnd: 60 sc
23 rnd: (8 sc, dec) х 6 times (54)
24 rnd: 54 sc
25 rnd: (7 sc, dec) х 6 times (48)
26 rnd: (6 sc, dec) х 6 times (42)
27 rnd: (5 sc, dec) х 6 times (36)
Insert a cotter pin of the body between the 17th and 18th rows at the line of a
marker, fasten it.
If you use the safety eyes, insert them between the 8th and 9th rows.
28 rnd: (4 sc, dec) х 6 times (30)
29 rnd: (3 sc, dec) х 6 times (24)
Stuff the head.
30 rnd: (2 sc, dec) х 6 times (18)
31 rnd: (1 sc, dec) х 6 times (12)
32 rnd: 6 dec.
Tighten the opening, hide a thread.
Tightenings of the head.
Mark the point of the mouth, approx. between the 8th and
9th rows of the head at the line of a marker.
I use halfbeads as the eyes.
Mark the places for the eyes with pins – approx. the 7-8 rows.
Fix a thread in the point of the mouth. Insert a needle in the point of the mouth
and take it out in the point of the left eye. Step two stitches, insert a needle, take it out
in the point of the mouth. Tighten. Repeat this action once more. Fasten off a thread in
the point of the mouth. Do not cut a thread.
Repeat the same for the right eye. Fasten off a thread in the point of the mouth
and hide it inside the head, cut.
Ears
Light beige color (2 details)
1 rnd: 6 sc in MR
2 rnd: 6 inc (12)
3 rnd: (1 sc, inc) х 6 times (18) Fasten off, cut the yarn
Brown color (2 details)
1 rnd: 6 sc in MR
2 rnd: 6 inc (12)
3 rnd: (1 sc, inc) х 6 times (18)
Do not cut the yarn.
Apply the beige detail of the ear by the right side to the wrong side of the brown
detail. Insert the hook I the first stitch of the beige detail, grasp not fastened loop of the
brown detail, draw out. Further crochet two details together: ch, 1 sc, inc, (2 sc, inc) х 5
times, 1 sc. Finish the row with a sl st. Fasten off, leave a long thread enough for sewing
Tail.
Brown color
1 rnd: 6 sc in MR
2 rnd: (2 sc, inc) х 2 times (8)
3-35 (33 rows): 8 sc.
Fasten off, leave a long thread enough for sewing.
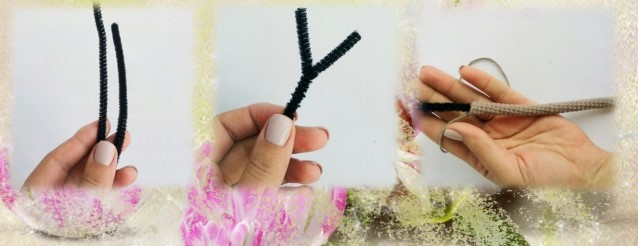
Reinforce the tail. I use a chenille wire. You can use any other wire: a wire for any
articles, floristic wire or any other not very thick wire, which bends well. If your wire is
smooth, I advise to wind it with a common medical adhesive plaster to make it more
safety and so as it will not slide inside the tail. You can add some stuffing, it is on your

discretion.
I used two chenille wires, twist them with each other, bend and fix well a sharp
end with pliers to make it more safety. The length of our wire should be for 2-3 cm
longer than the tail.
Insert our wire in the tail. Insert a free end of a wire in the bottom)) of the
monkey. Sew the tail.
Here is our monkey ready!
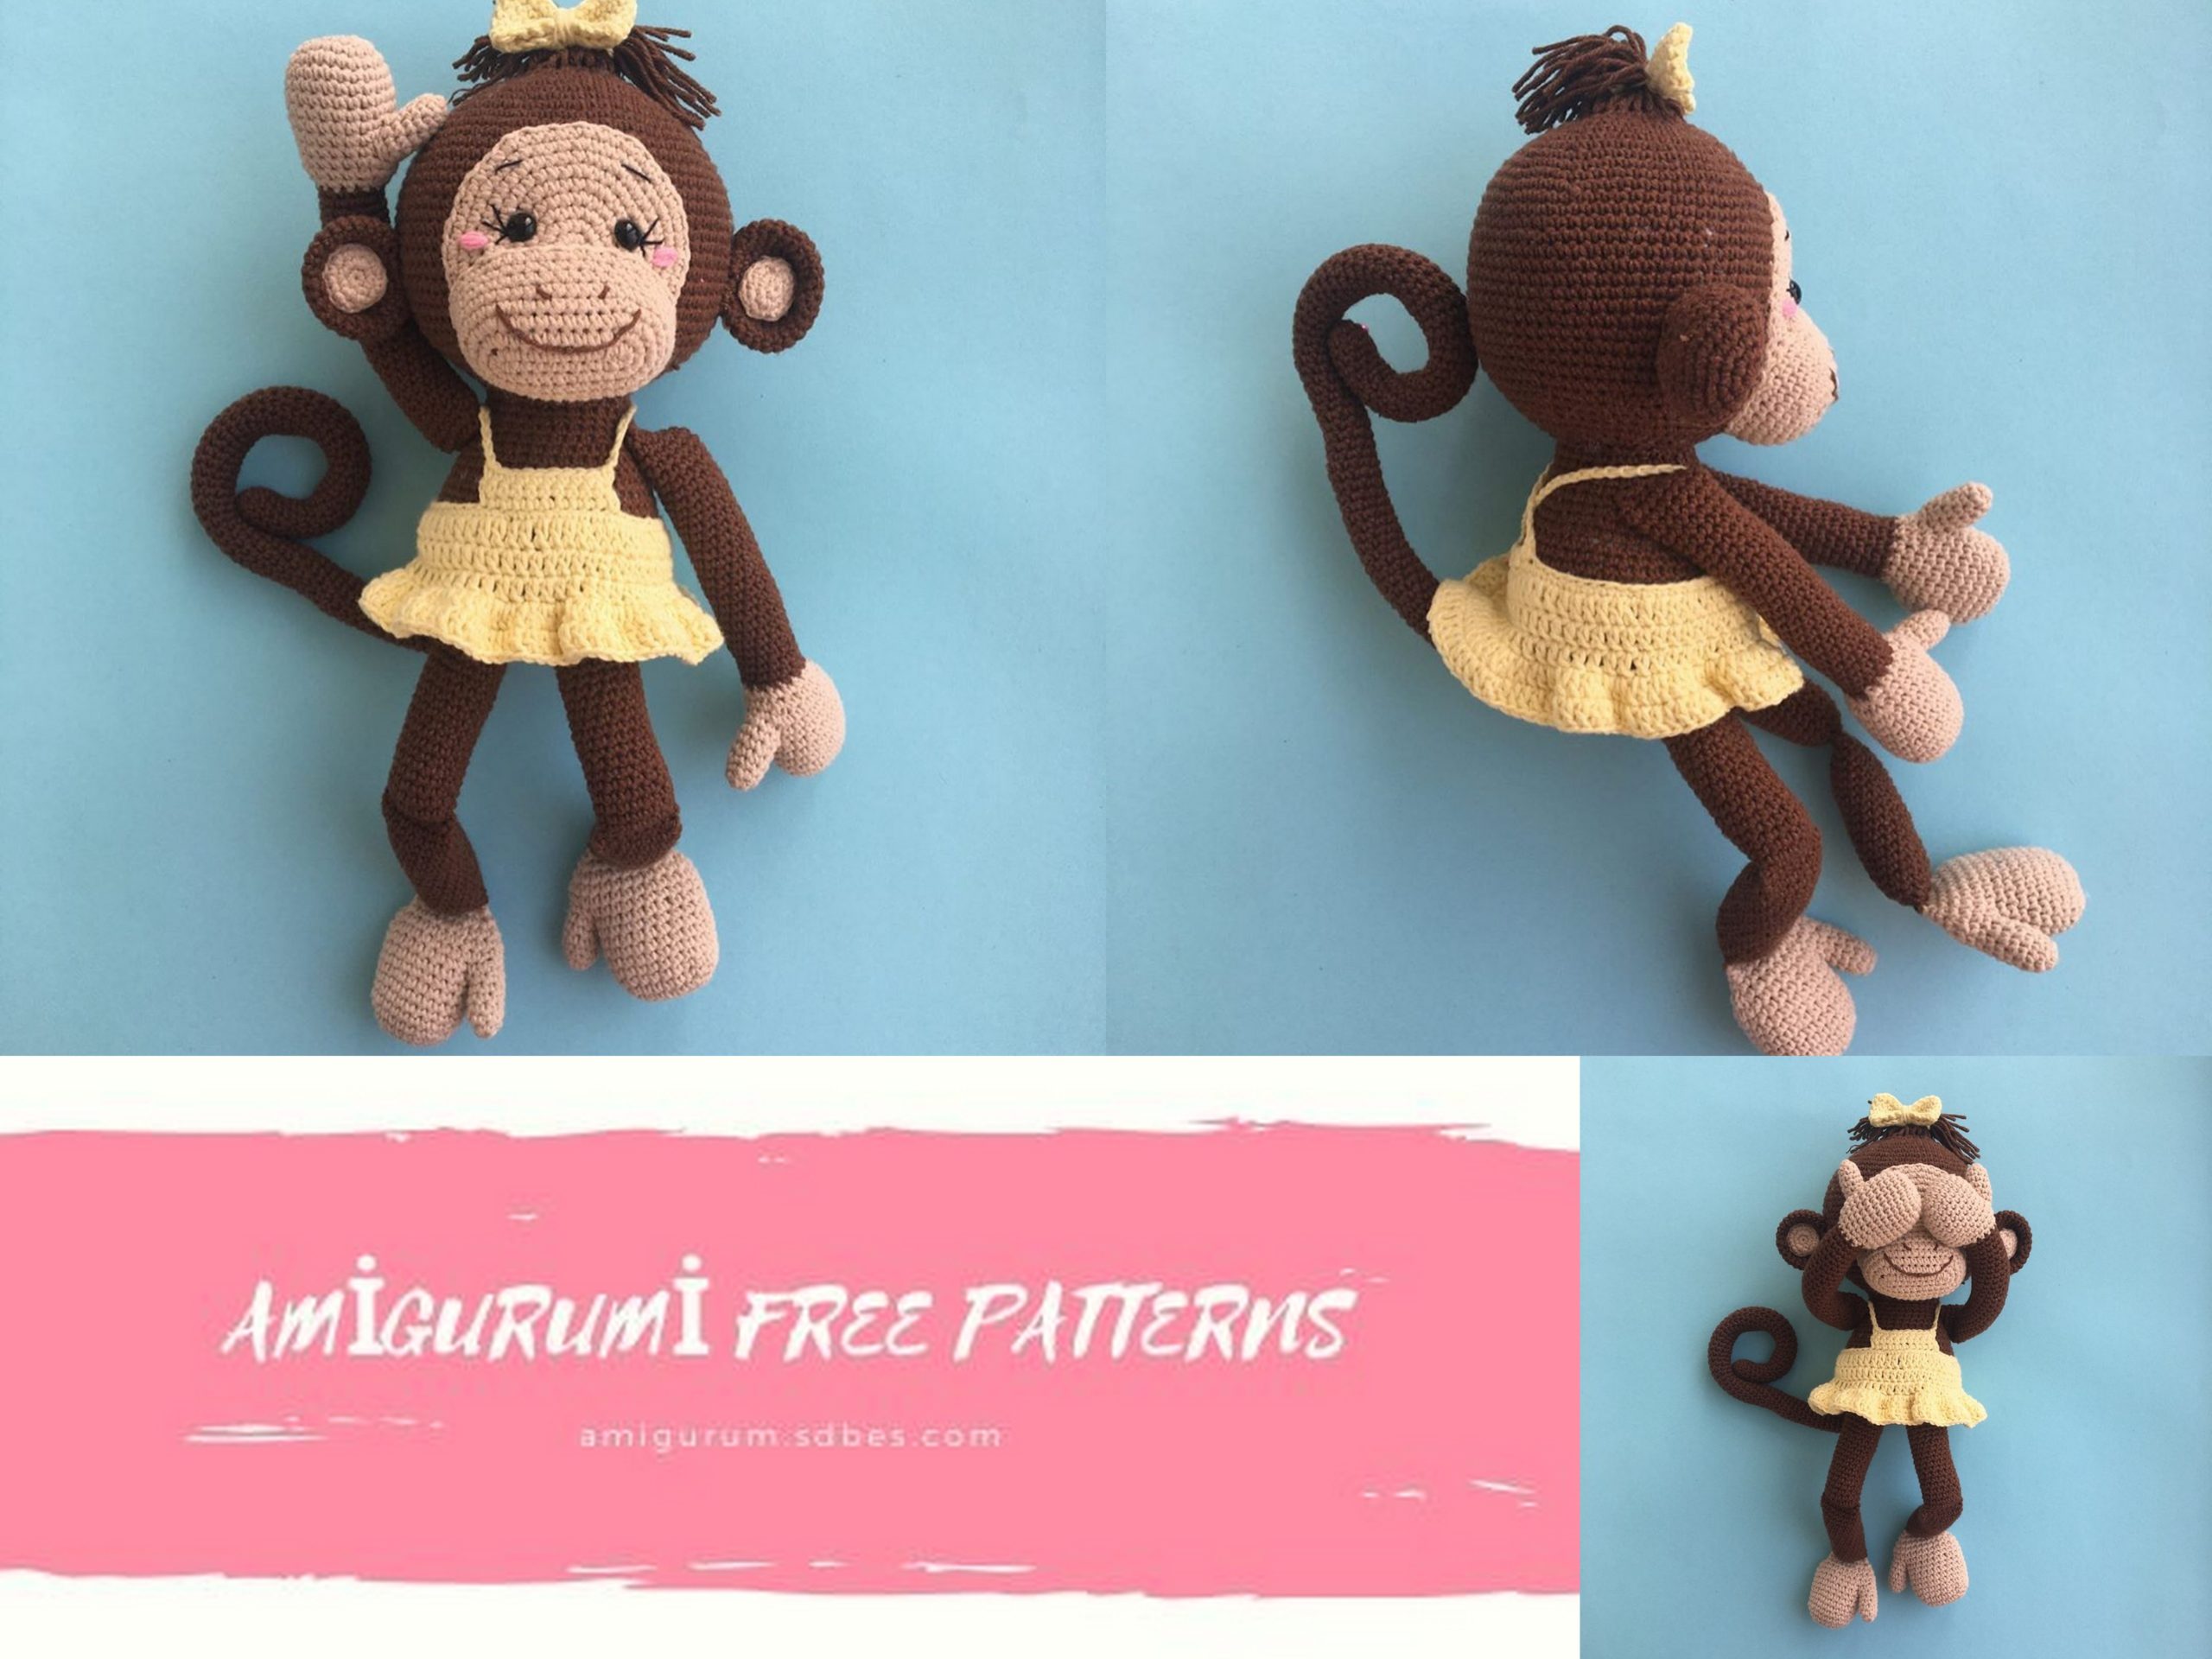

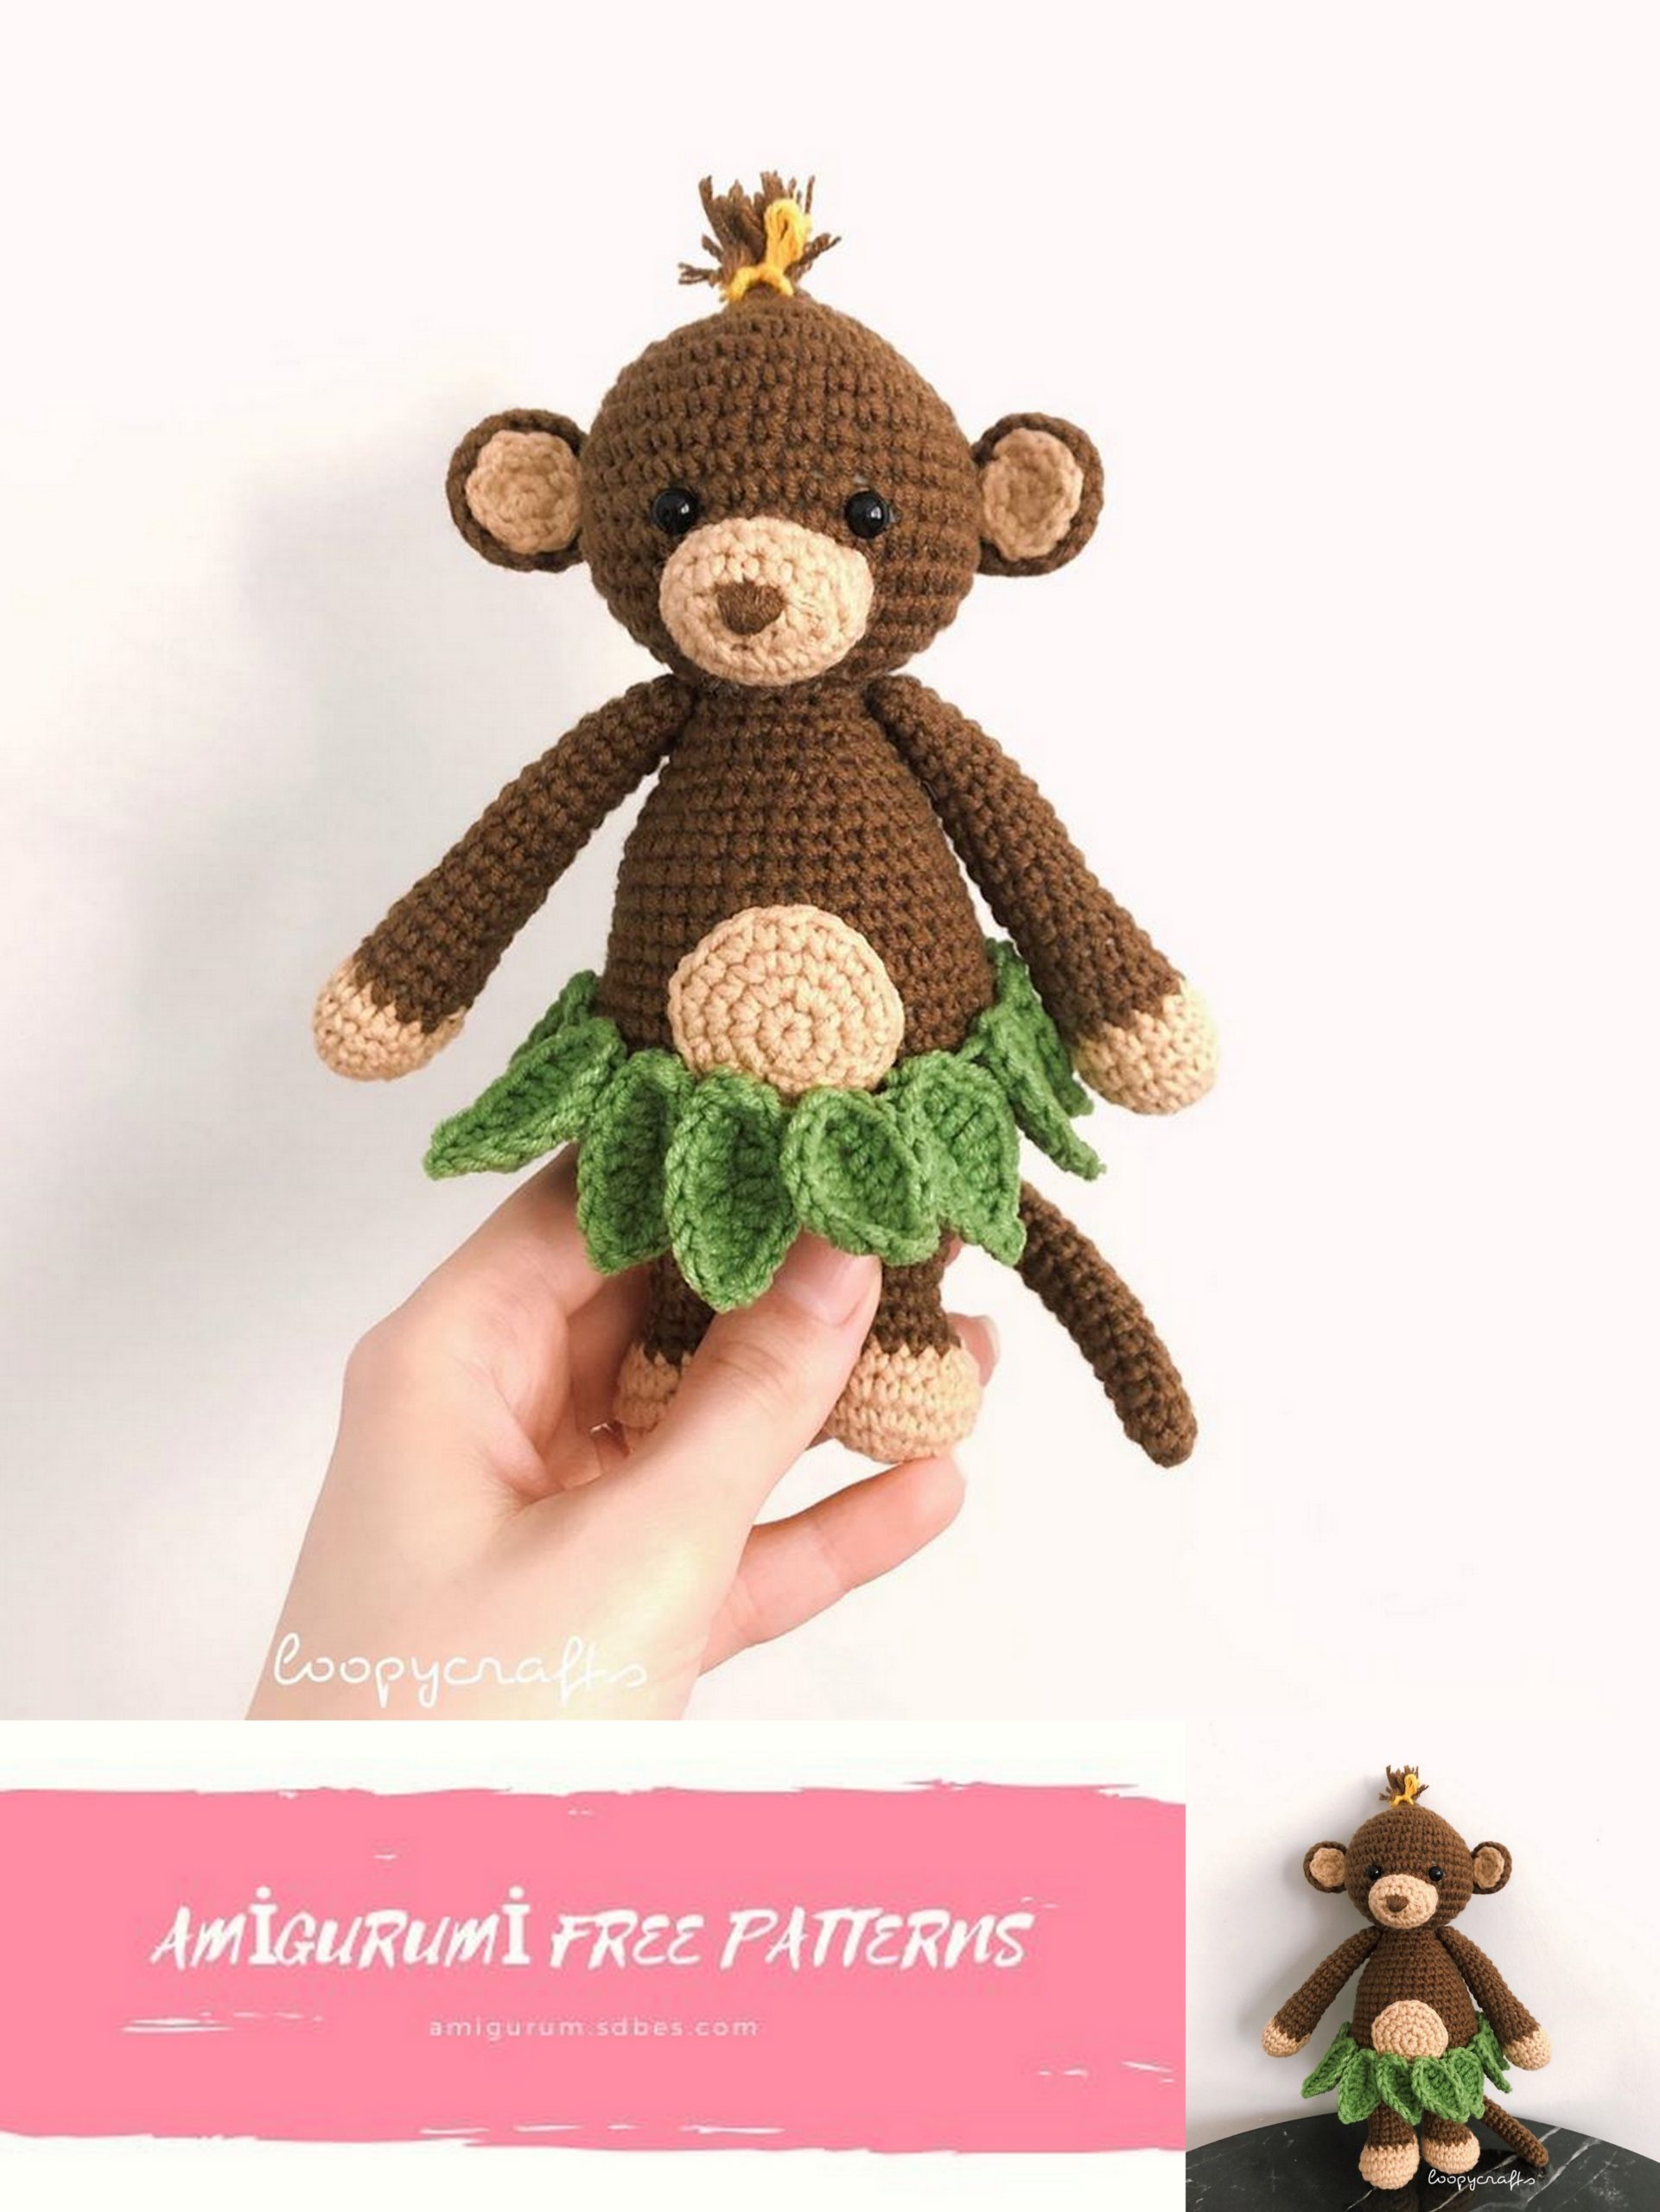

where is the pattern for the regular monkey, not the one with the dress?
ReplyDeleteBanana pattern?
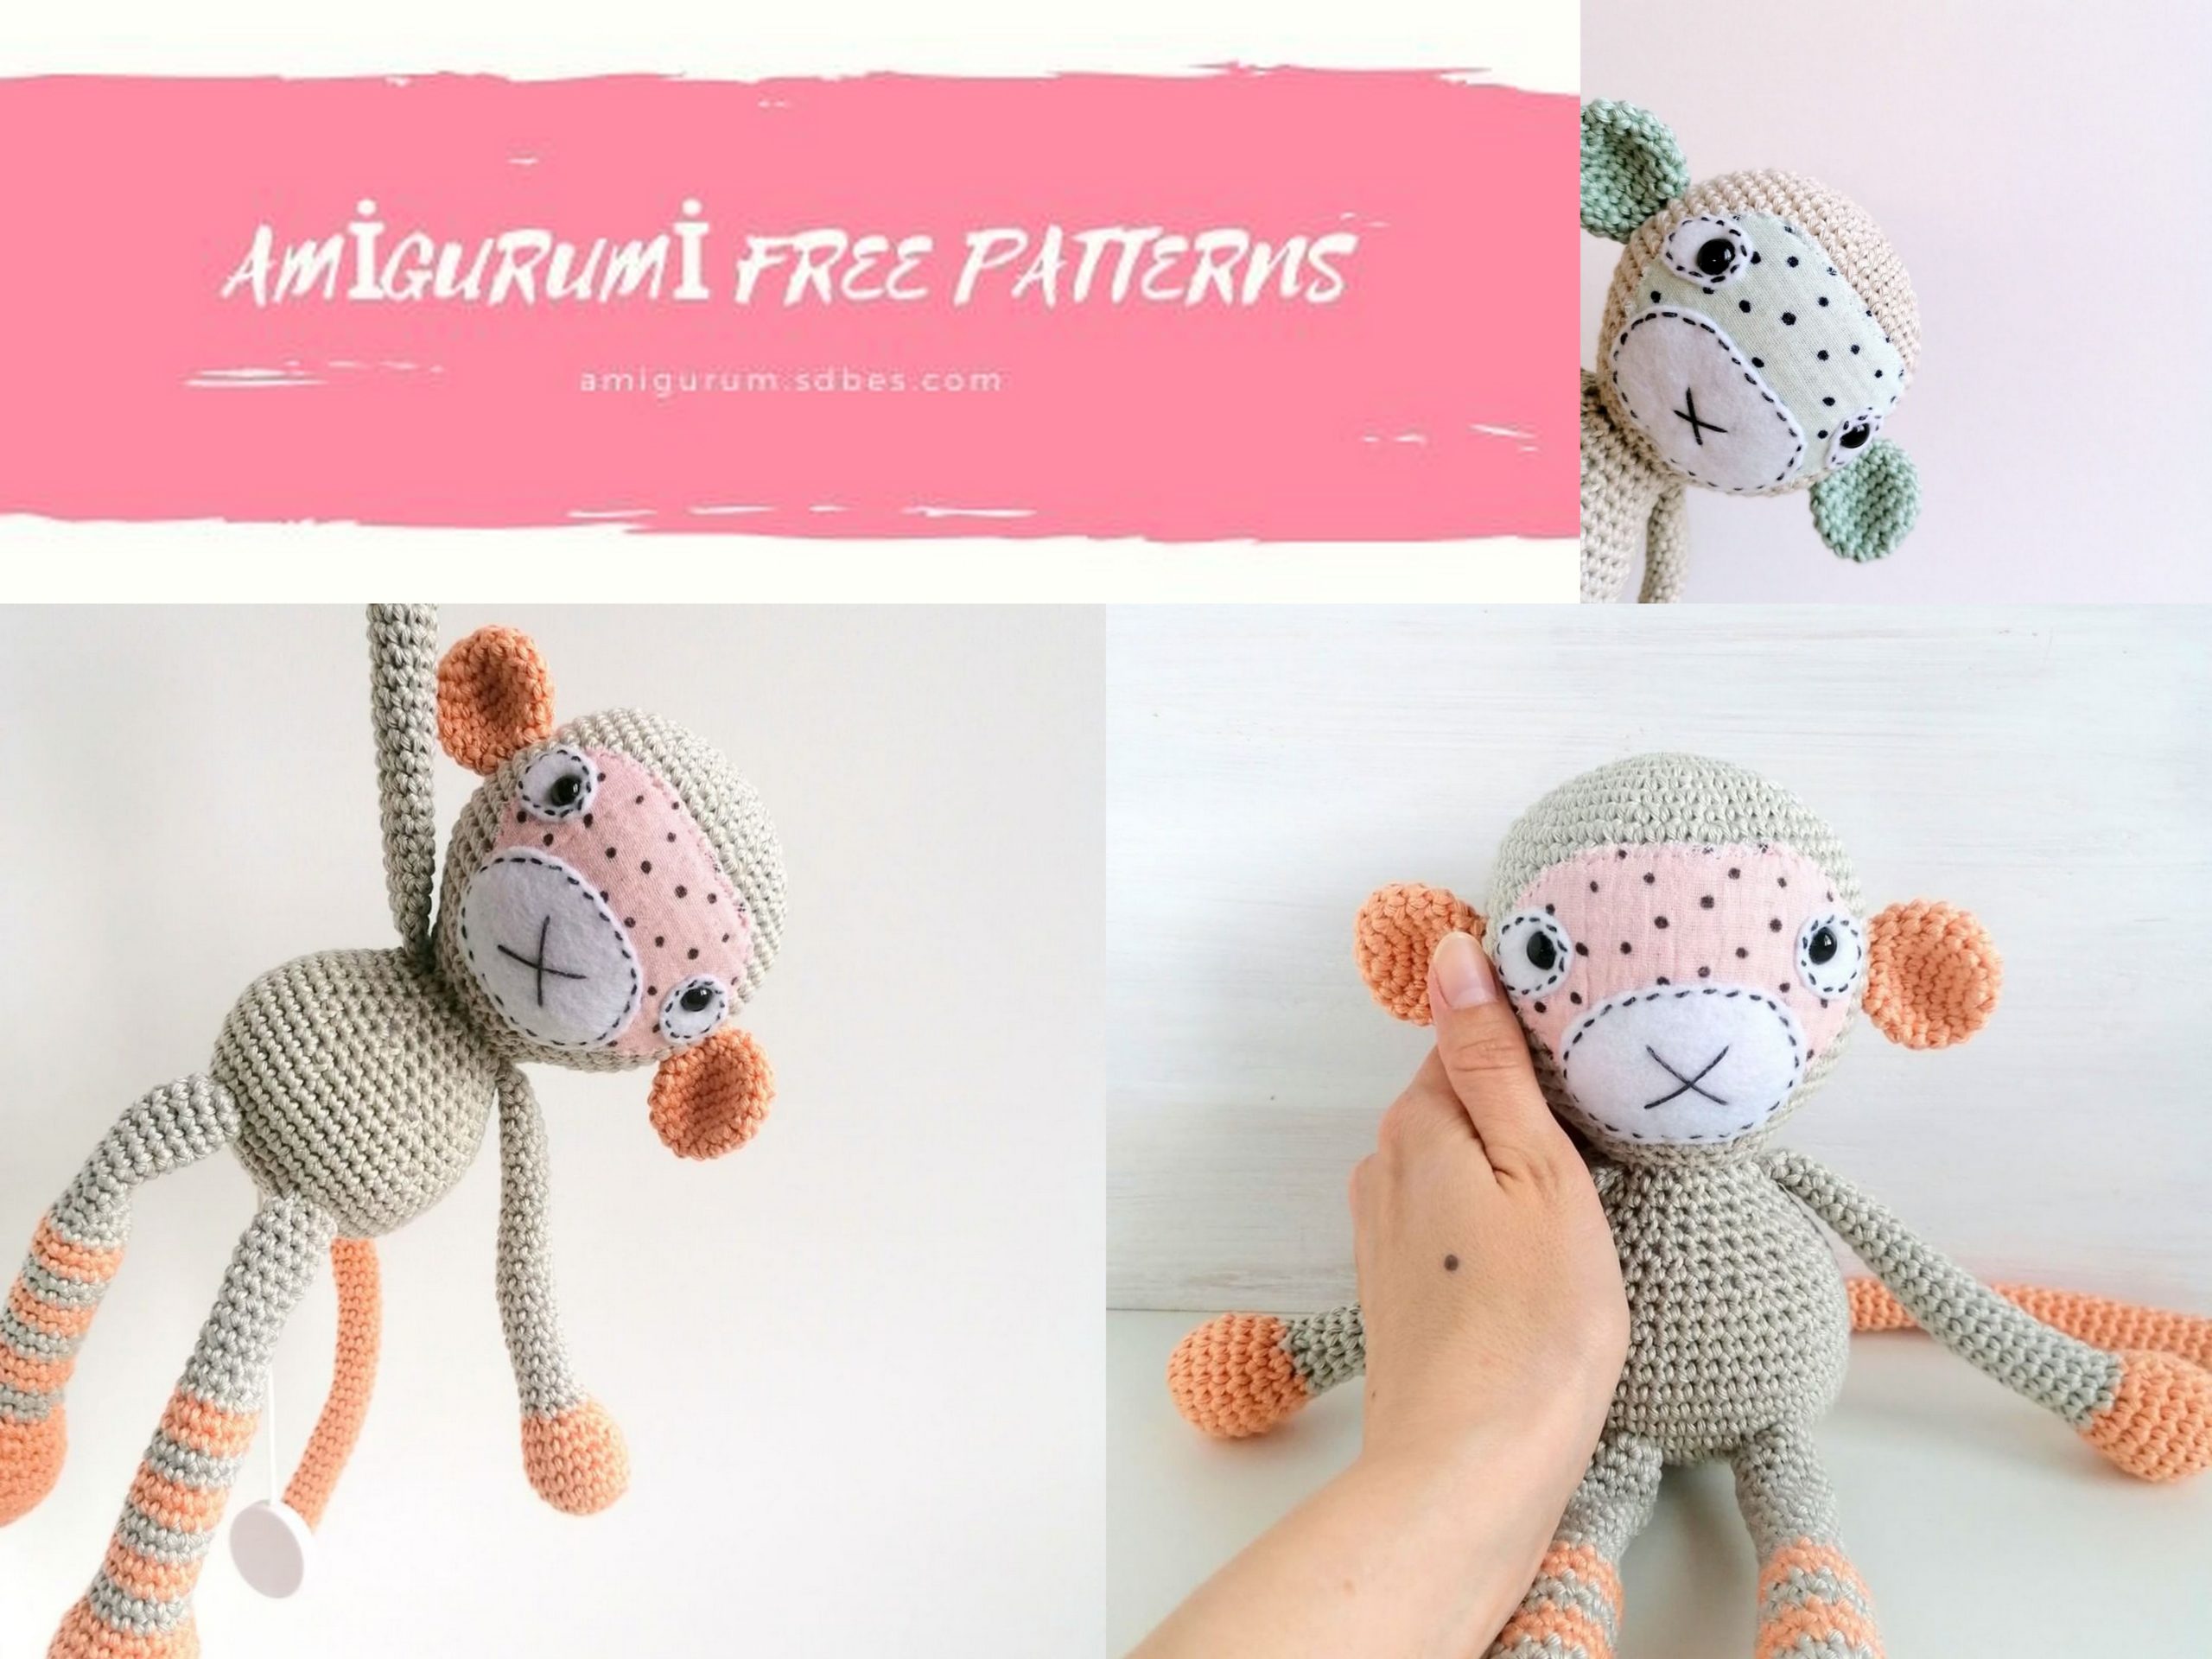
ReplyDeleteIt seems that the pattern and the pictures in the top don't match :/
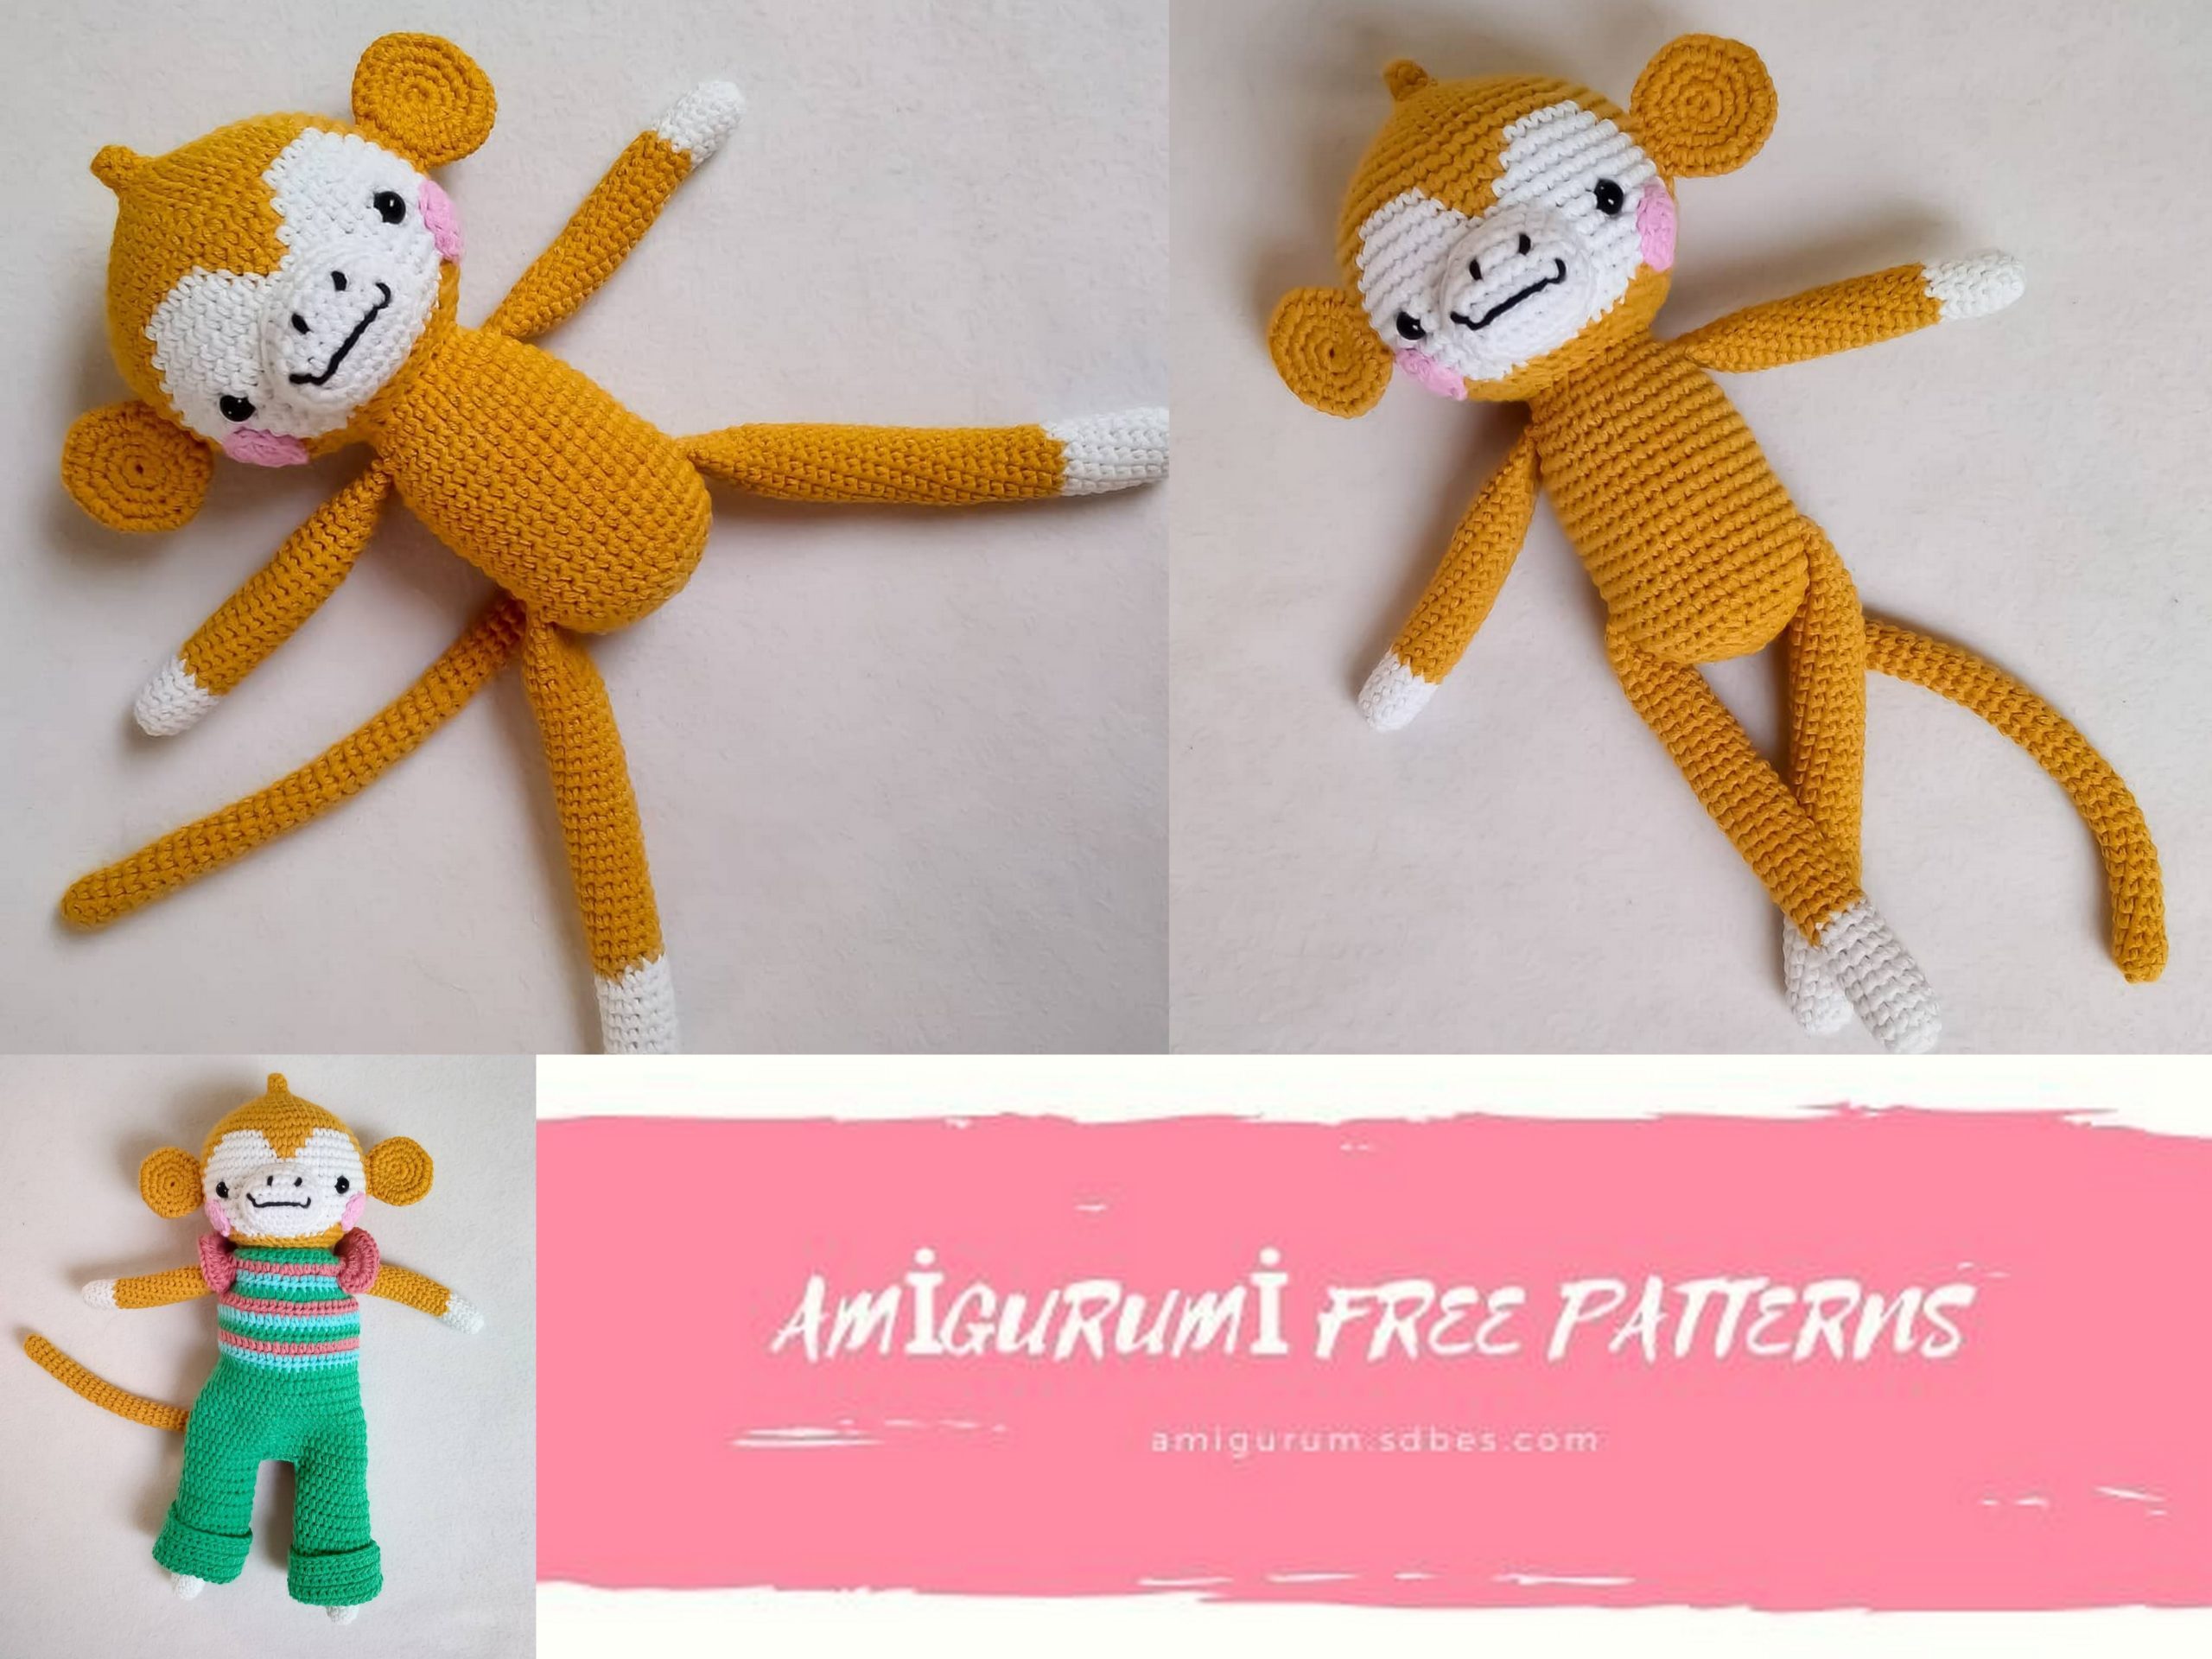
ReplyDeleteAlso looking for the pattern of the little monkey shown in the picture, which doesn’t match the directions given.
ReplyDeleteI’ve seen it on Etsy. I don’t think it’s free anymore
DeleteI would like to have pattern of the girl in the gray dress shown on front vickigilham47@gmail.com
ReplyDelete